Showing posts with label card making. Show all posts

Tuesday, June 28, 2011

Project 24: Repurposed Greeting Cards

We all have them: tacky greeting cards from greeting card collections or misguided purchases, sitting around, never to be given to anyone because they're just too hideous. Or perhaps you have a collection of greeting cards given to you for birthdays and holidays that you can't bear to throw away.

Here's a way to turn the cards into something unique and new. Take these two hideous specimens below. By cutting out the bugs and flowers from one card, and the kitty from the other, we can create two brand-new cards that you won't be embarrassed to send.

Ugly greeting cards, awaiting transformation

What You Need

  • ugly greeting cards to cut up
  • blank greeting cards
  • paper scraps, stickers, trims, embellishments
  • pigment ink pad
  • decorative scissors and regular scissors
  • dimensional foam tape
  • glue stick

First, the most satisfying part: cut out the parts of the ugly cards that you would like to keep, and discard the rest.

Now, the challenge: how to make two new cards out of these bits of old cards. I stockpile decorative papers, images, felt shapes, and stickers. When I'm working on a card project, I pull out a bunch of papers and items with a similar theme and choose among them. Here's a stash below; I ended up not using most of the items, but just looking through them helped me plan the composition.
Cut out the parts of the cards you want to keep, and grab an assortment of scraps and embellishments to consider.
These two cards are for a young girl, so the plan is to keep them simple, bright, and cheerful. Starting with the cat card, the paper with colored circles caught my eye. A card with an inked background, overlaid with the paper, with the cat on top seemed like a good start.

Start by using an ink pad to color the paper, inking the paper directly with the ink pad.

Ink the paper directly with the ink pad
Use decorative scissors to cut out the paper. Glue it down with a glue stick, then affix the cut-out cat on top with dimensional foam tape. The dimensional tape helps the cat stick up a little, giving a bit of a 3-D look to the card. Alright, that's a good start to the card. We'll add more later.
First card in progress, with papers and image affixed
On to the second card. On this card, leave the background white, so as not to compete with the busy pattern of the printed paper we're using here. It's a funky nature-themed paper, perfect for the little bugs we'll add in.

Glue the paper down with a glue stick, then position the bugs on the card, some coming in from the edge, others pointing outward to give it a dynamic look.
Give paper an attractive edging with decorative scissors 
We're now ready to put the finishing touches on both cards. For the cat card, I added a decorative sticker border, and two big colored star stickers. Again, this is for a young girl, so the big, bright colors work. I finished it with glitter glue in a blue-green patina color, using it to rim both the edges of the paper and to add dots on the edges of the card, the stars, and the sticker border, tying the look together.

For the bug card, a felt flower with an added flower sticker in the middle added dimensionality and a different texture to the card. And no card is complete without a bit of shine; red Dresden foil trim at the bottom adds that shine and ties in with the red of the ladybugs.
The finished cards
That's two cards, repurposed! When creating cards, keep the age of the recipient in mind - this look wouldn't work for anyone over the age of ten. But you're sure to find old greeting cards that fit the occasion perfectly - once they're chopped up, of course.

Tuesday, May 3, 2011

Week 18: Triple Flower Mother's Day Card

Mother's Day is coming up, and you've got to give Mom a card. Will it be a store-bought Mother's Day card with sentiments written by someone else, or will it be a card handmade with love for the mothers and grandmothers and women in our lives who have mentored and loved us? Well duh. Obviously, we'll go with option #2.

My mother loves gardening, so this card is floral feast, with three kinds of flowers: a real, pressed flower, an image transfer flower image, and a "mom" decal on floral paper. Yum. Let's get started.
Three kinds of flowers on this mom's day card

What you need
For the pressed flowers:

  • flower press or big, heavy book
  • fresh flowers, preferably ones with few petals
For the image transfer:
  • magazine images
  • soft gloss gel (Liquitex)
  • paintbrush
  • small tray (a toaster oven tray works well)
For the card:
  • blank card and envelope
  • pigment ink (Palette)
  • scissors and decorative scissors
  • craft glue
  • collage glue (Mod Podge)
  • German foil trim (can be found online at 32 Degrees North)
  • double-sided foam tape
  • rubber stamp or sticker with a Mother's Day theme ("mom" or the like)


Some of the things you need, clockwise from left: craft glue, Mod Podge, scissors, craft scissors, blank card, German foil trim, flower press, pigment ink, stickers, double-sided foam tape

Step 1: Pressed flowers
Gather some flowers, and using a flower press, press the flowers between the leaves. Or, if you don't have a flower press, put them between the pages of a big, heavy book. Many-petaled flowers, such as roses, don't press as easily as small flowers such as pansies. This card uses a Lenten rose (hellebore).

After a few days, check your flowers. They should be pressed flat and dry to the touch before you use them.


Step 2: Image transfer
First we'll take a printed image and spiff it up so that it's card-worthy. We could just glue a cut-out magazine picture straight onto the card, but that's kind of tacky looking: it has that thin glossy magazine paper look, and there's other stuff on the back side of the image. We'll take the image and transfer it onto a hardened gel "skin" that we can then glue on to our card.
Brush a coat of gel over your images and let them dry. I'm doing a batch here, to use in other projects. Then brush on four more coats, letting each coat dry between applications. Each coat dries quickly - in about fifteen minutes.
When the last coat of gel is dry, put your image paper-side down into a tray filled with water. Let it soak for a minute or so, or until the paper is saturated.
Take out the image, turn it over, and start rubbing the paper away with your fingers. Presto! You can see the picture from the other side start to show through. Keep rubbing until you've removed all the paper. You can get any stray bits with a Magic Eraser.
Use decorative scissors to trim a pretty border around your image.

Step 3: Putting it all together

With our pressed flowers and image transfer ready to go, let's put all the pieces together and add some finishing touches.

Start by inking the borders of your card, leaving the middle clear. The image transfer becomes transparent, so if you have a dark-colored background, when you glue down the image, it'll look murky.
Add a little dimensional embellishment by cutting a small piece of floral paper and sticking a clear "Mom" sticker on it.
Glue the image transfer down with craft glue, and carefully glue the flower with collage glue (you can see the wet glue in this photo). Then take the little "Mom" embellishment and attach it with double-sided foam tape so that it sticks up a little.
The card didn't look quite done, so I added some blue German foil trim under the "Mom" and along the bottom of the card. Adding a little shiny trim really makes a difference. I also used a metallic pen to color the edges of the image transfer, adding some sparkle.

Happy Mother's Day, and happy card-making!

Sunday, February 6, 2011

Week 6: Grunge Valentine

I'm cool with the concept of Valentine's Day, but not the marketing. For example: those overpriced prix-fixe dinners where you're packed in like sardines. And the treacly pink and red frilly heart cards with pre-fab poems inside? Ick. For this week's project, let's make a card that's romantic but low-key -- camouflage colors rather than over-the-top faux romance.
No pink, red, or doily frills on this card.

What You Need

  • blank card (The Paper Company or Reflections)
  • art metal (Ten Seconds Studio)
  • art metal tools (paper stump, mold, sanding block)
  • pigment inks (Palette)
  • rubber stamps of your choice
  • alcohol inks (Adirondack)
  • alcohol ink applicator and applicator felt (Adirondack)
  • glue stick, tacky glue, and double-sided foam tape
  • wax paper
  • embellishments (ribbon, Dresden foil trim)

Note: you can buy all these supplies at a craft store, such as Michael's, except for the art metal (find it via Amazon) and the Dresden foil trim (www.vintageornaments.com)
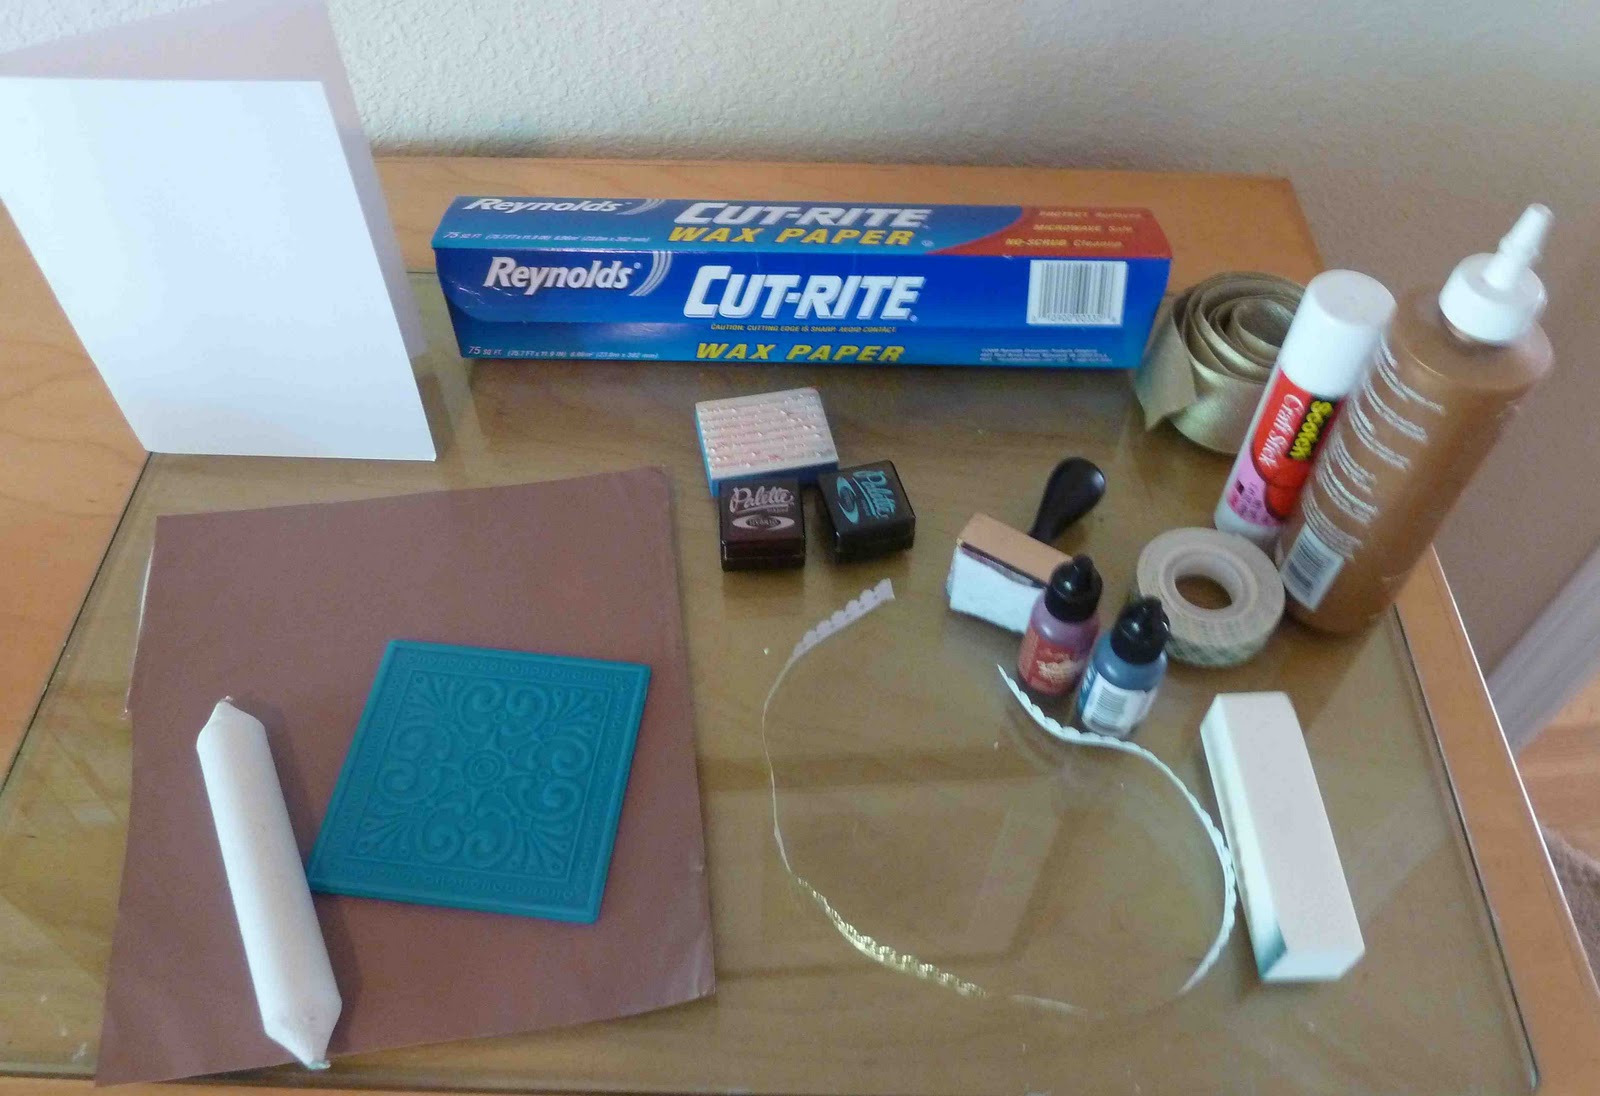
What you need, clockwise from top left: blank card, wax paper, rubber stamp, ink pads, ribbon, glues and foam tape, alcohol inks and ink applicator, sanding block, Dresden foil trim, art metal, metal mold, paper stump.
This project mixes a few unusual supplies: art metal and alcohol inks. We worked with art metal in Week 3; this week we'll add in both regular pigment ink and alcohol ink to create layered backgrounds.

Step 1: Grungy background
Take some pigment ink and rub the stamp pad directly on the front of the card to add color all over it. I started with a base of sunflower yellow.
Rub the stamp pad directly onto the card.

Then, take a rubber stamp of your choice -- I had a stamp with various lovey-dovey quotations on it -- and stamp it uniformly all over the card.
Second inked layer: rubber stamped quotations

Then grab whatever color stamp pads you might have -- I happened to have some blue and green pads at hand -- and stamp them over the rubber stamped images until the background has a nice mottled look with different complementary colors. Tim Holtz Distress inks are great for creating an aged look; I don't own them (yet) so I made do with regular ink pads. Palette brand hybrid ink pads work well because they're low-moisture enough that they don't saturate the paper and cause it to curl.

Use a paper towel to blend the stamped colors, and when it looks mottled and aged enough, move on to Step 2.

Step 2: Art metal heart
Take a look back at Week 3 for instructions on how to work with art metal, which is a thin, colored metal that you can emboss and cut with scissors. Cut out a heart shape from the metal and emboss and distress it following the instructions from Week 3.
Distressing the metal with the sanding block

Now let's color the metal using alcohol inks: special inks you can use on glossy surfaces and metal. They have a transparent effect similar to watercolor; you apply them using a special applicator with a felt pad. Squeeze a few drops of different colors of ink onto the alcohol ink applicator and pounce them around the art metal until you're satisfied with the look. I used a few different applications of ink using different colors to create a mottled effect similar to the mottled card background.
Adding alcohol ink to the metal with the ink applicator. See how it creates a subdued, mottled effect.

Step 3: Alcohol ink background
We'll continue playing with alcohol inks by adding a background layer of wax paper covered with alcohol inks. Tear off a piece of wax paper. With a new piece of applicator felt, add some alcohol ink and pounce it over the glossy side of the wax paper. Use less ink for a more subdued effect, and more ink for a more richly toned effect.

With some ink left over on the applicator felt, I added some to the cardstock background too. On plain paper, the inks come out brown and blotchy - perfect for the aged, distressed look we're going for here.

Step 4: Putting it all together
Cut the inked wax paper into a square and glue it to the middle of the card with a glue stick. Cut small pieces of gold Dresden foil trim and glue them to the top left and bottom right borders of the wax paper. Then glue a piece of wide gold ribbon diagonally across the card with tacky glue, on top of the wax paper layer and the card background.

Cut small pieces of double-sided foam tape and stick them on the back of the piece of art metal heart, then affix the heart to the center of the card. The foam tape gives a nice 3-D effect to the card.

Take some wax paper remnants that have alcohol ink on them and cut thin borders with them. Glue those to the top and bottom of the card with a glue stick.

And there you have it: a decidedly unconventional Valentine's Day card.