 |
| No pink, red, or doily frills on this card. |
What You Need
- blank card (The Paper Company or Reflections)
- art metal (Ten Seconds Studio)
- art metal tools (paper stump, mold, sanding block)
- pigment inks (Palette)
- rubber stamps of your choice
- alcohol inks (Adirondack)
- alcohol ink applicator and applicator felt (Adirondack)
- glue stick, tacky glue, and double-sided foam tape
- wax paper
- embellishments (ribbon, Dresden foil trim)
Note: you can buy all these supplies at a craft store, such as Michael's, except for the art metal (find it via Amazon) and the Dresden foil trim (www.vintageornaments.com)
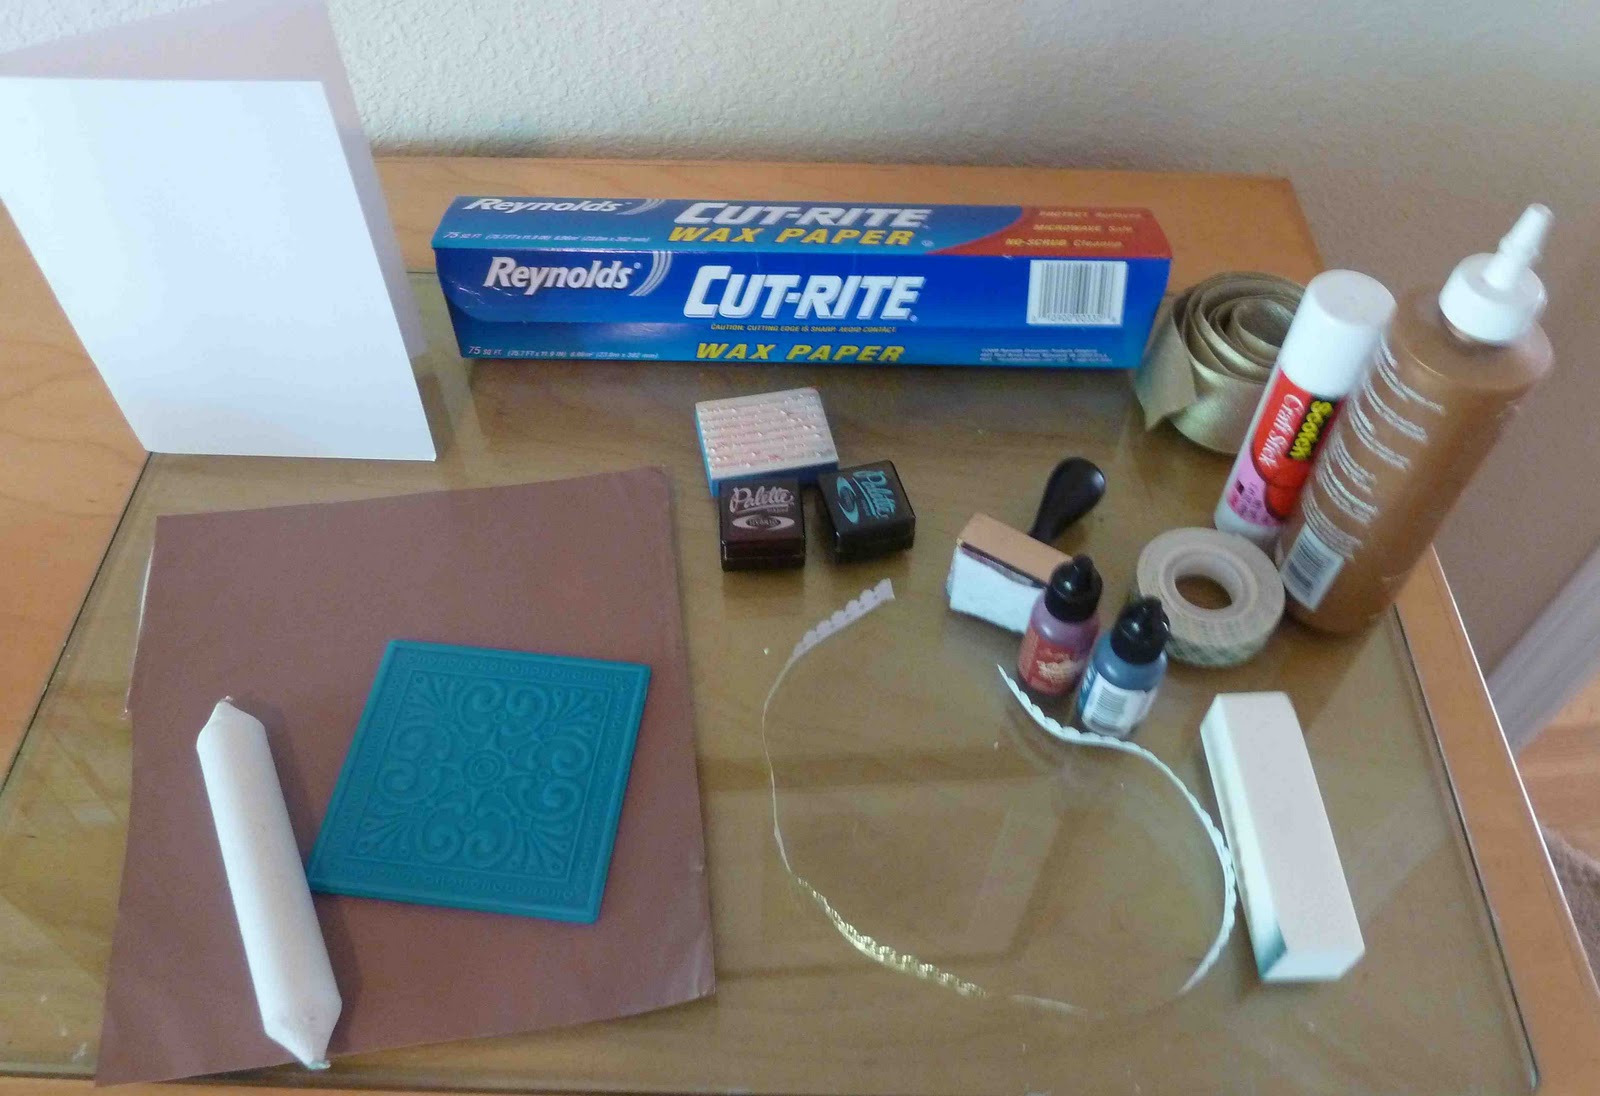 |
| What you need, clockwise from top left: blank card, wax paper, rubber stamp, ink pads, ribbon, glues and foam tape, alcohol inks and ink applicator, sanding block, Dresden foil trim, art metal, metal mold, paper stump. |
Step 1: Grungy background
Take some pigment ink and rub the stamp pad directly on the front of the card to add color all over it. I started with a base of sunflower yellow.
 |
| Rub the stamp pad directly onto the card. |
Then, take a rubber stamp of your choice -- I had a stamp with various lovey-dovey quotations on it -- and stamp it uniformly all over the card.
 |
| Second inked layer: rubber stamped quotations |
Then grab whatever color stamp pads you might have -- I happened to have some blue and green pads at hand -- and stamp them over the rubber stamped images until the background has a nice mottled look with different complementary colors. Tim Holtz Distress inks are great for creating an aged look; I don't own them (yet) so I made do with regular ink pads. Palette brand hybrid ink pads work well because they're low-moisture enough that they don't saturate the paper and cause it to curl.
Use a paper towel to blend the stamped colors, and when it looks mottled and aged enough, move on to Step 2.
Step 2: Art metal heart
Take a look back at Week 3 for instructions on how to work with art metal, which is a thin, colored metal that you can emboss and cut with scissors. Cut out a heart shape from the metal and emboss and distress it following the instructions from Week 3.
 |
| Distressing the metal with the sanding block |
Now let's color the metal using alcohol inks: special inks you can use on glossy surfaces and metal. They have a transparent effect similar to watercolor; you apply them using a special applicator with a felt pad. Squeeze a few drops of different colors of ink onto the alcohol ink applicator and pounce them around the art metal until you're satisfied with the look. I used a few different applications of ink using different colors to create a mottled effect similar to the mottled card background.
 |
| Adding alcohol ink to the metal with the ink applicator. See how it creates a subdued, mottled effect. |
Step 3: Alcohol ink background
We'll continue playing with alcohol inks by adding a background layer of wax paper covered with alcohol inks. Tear off a piece of wax paper. With a new piece of applicator felt, add some alcohol ink and pounce it over the glossy side of the wax paper. Use less ink for a more subdued effect, and more ink for a more richly toned effect.
With some ink left over on the applicator felt, I added some to the cardstock background too. On plain paper, the inks come out brown and blotchy - perfect for the aged, distressed look we're going for here.
Step 4: Putting it all together
Cut the inked wax paper into a square and glue it to the middle of the card with a glue stick. Cut small pieces of gold Dresden foil trim and glue them to the top left and bottom right borders of the wax paper. Then glue a piece of wide gold ribbon diagonally across the card with tacky glue, on top of the wax paper layer and the card background.
Cut small pieces of double-sided foam tape and stick them on the back of the piece of art metal heart, then affix the heart to the center of the card. The foam tape gives a nice 3-D effect to the card.
Take some wax paper remnants that have alcohol ink on them and cut thin borders with them. Glue those to the top and bottom of the card with a glue stick.
And there you have it: a decidedly unconventional Valentine's Day card.
I love your Valentine! Thanks for the great details.
ReplyDeleteThanks so much, Vic! If you try any of these techniques, let me know how your project turns out!
ReplyDeleteLOve your card and the technique and details! I'm looking forward to seeing more of your creativity.. new to your blog!
ReplyDeleteThanks so much Sharon, glad you are enjoying it!
ReplyDelete