Showing posts with label polymer clay. Show all posts

Monday, February 14, 2011

Week 7: Hello Sunshine

By February, no one's interested in winter anymore. Although spring's not due for a while yet, painting this brightly colored, folk art-style planter pot could be the next best thing.
Two views of the finished pot

What You Need
  • terra cotta pot
  • acrylic gesso (Liquitex)
  • artist's acrylic paints (colors of your choice; I used ultramine blue, cadmium red medium, cadmium red deep, phthalocyanine green, and titanium white)
  • artist's paintbrushes (various sizes: large bristle for covering large areas, and small smooth brushes for detail work)
  • foam brush
  • palette paper or freezer paper
  • sun and star-shaped stencils or polymer clay, rolling pin, sun and star shaped cookie cutters
  • tacky glue
  • gloss varnish (Liquitex)
  • optional: beads and embellishments, face-shaped rubber stamp, glitter glue (Stickles)
What you need, clockwise from left: polymer clay, cookie cutter, rubber stamp, rolling pin, tacky glue, gloss varnish, palette paper, acrylic paints, brushes, foam brush
This week, we'll be working with acrylic paint and your choice of polymer clay or stencils to create the sun and stars on the pot.

Step 1: Prep the pot
This pot had been home to last summer's sunflowers, so I soaped it up with some dish detergent to get the grime off, washed it thoroughly with the garden hose, then let it dry overnight.
Start with a clean, dry terra cotta pot
Next, we need to seal and prepare the pot with gesso to create a uniform surface for painting. Gesso is like paint primer - just as you wouldn't paint bare drywall without adding primer, you want to coat your surface with gesso before painting as well. Squeeze some gesso onto a piece of palette paper, then spread it evenly over the outside of the pot with the foam brush. One coat is fine - it will cover the pot lightly, but it'll be fine enough to paint over.
Adding gesso
The gessoed pot, ready for painting

Let the gesso dry.

Step 2: Design
With a pencil, sketch in the rough basics of your design. My original plan was a straight line across the middle of the pot, with the sun above and stars below, but that looked pretty boring when I sketched that in. Changing it to a swooping curve became much more dynamic.

Step 3: Paint background colors
Squeeze your paint colors onto the palette paper or freezer paper, keeping handy some paper towels and a water container to dip your brushes in. Use any colors you like; for the bottom half of the pot, I mixed phthalocyanine green with cadmium yellow medium and a little titanium white. The top half is ultramine blue mixed with a little cadmium yellow medium. And for the red rim and red accents, I used cadmium red medium mixed with a little cadmium red deep. Using these strong colors almost straight from the tube without mixing in much white creates a bright, saturated color effect - exactly what's needed to banish the winter blahs.
Painting in the background colors
When painting large areas, a larger bristle artist's brush works well. Make sure to apply the paint evenly. When it dries, if you see lighter spots, just mix your colors and reapply more paint (keep note of the color combinations you used!). Use a smaller, smooth brush to do more detailed work.

After the large areas of paint are dry, add whatever painted embellishments you like. I added some red and yellow accents in the middle and around the bottom, and some yellow swirls near the top and inside the pot rim.
The finished background, with painter's tape marking the placement for the suns and stars
Step 4: Add sun and stars
Now you can either stencil sun and star shapes onto the pot using acrylic paint, or create polymer clay suns and stars to glue on to the pot, as here, which gives the pot a fun 3-D look.

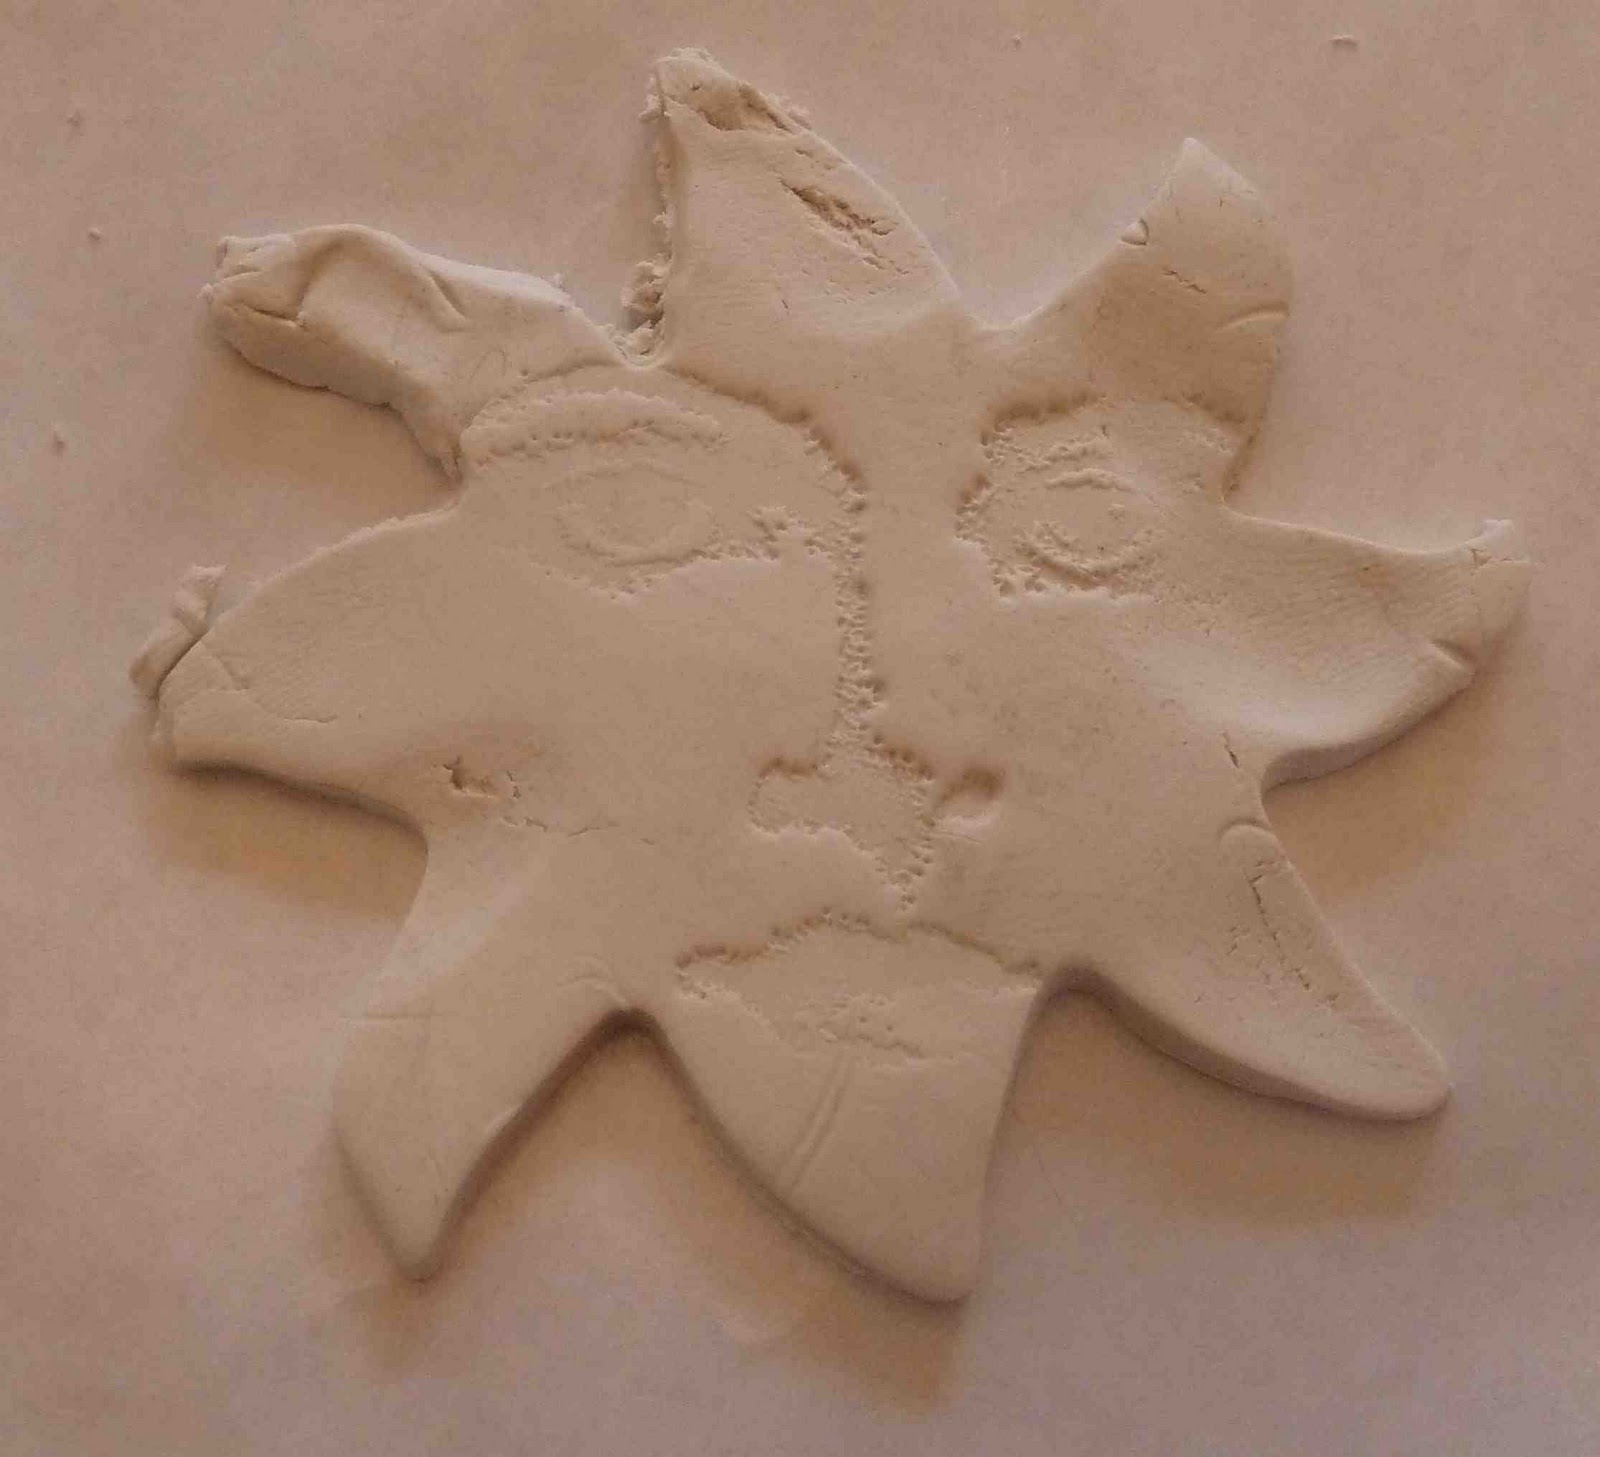
Follow the polymer clay instructions from Week 5, using sun and star-shaped cookie cutters to cut out the shapes.
Cutting out the sun shape with a cookie cutter
I stamped a face shape onto the sun for an interesting accent
Bake the polymer clay (again following the instructions from Week 5) and when it's cooled, paint it with acrylic paints.

Embellish your suns and stars however you like; I used glitter glued down with acrylic polymer medium for the sun faces, along with beads glued onto the sun faces for eyes and mouths, and beads scattered onto the stars. You could also add shine and color directly to unpainted polymer clay with pigment powder.

Glue your suns and stars onto the pot. This was the tricky part - because the pot was upright, the sun and stars kept wanting to slip down the sides of the pot. Blue painter's tape worked well to hold them in place while they dried.
Almost finished . . .
The pot was almost done, but it needed just a bit more pizzazz. Glitter spirals (using Stickles glue) did the trick.

Step 5: Varnish
Your pot will be weather resistant once you seal it with a protective coat of varnish. Brush on two coats of acrylic gloss varnish, letting the first coat dry before brushing on the second. Then . . . count the days until spring.

Update: have a look at Week 10 to see a stenciled version of this pot!

Sunday, January 30, 2011

Week 5: Classy Magnets

If your refrigerator is like mine, the fridge magnet situation is pretty lame. Magnetized advertisements for nail salons and defunct banks hold up a mess of grocery lists, kid classroom projects, and recipes. This week, let's toss the tacky magnets and glamorize our refrigerators with some classier replacements.
Mermaid magnets!
What You Need:
  • polymer clay (Sculpey)
  • t-shirt transfer paper for inkjet printers (Avery)
  • digital images
  • sticky-backed magnets (ProMag)
  • rolling pin
  • freezer paper and parchment paper
  • two disposable metal pie pans, metal clamps
  • clay tool or Xacto knife
  • bone folder or spoon
  • gloss varnish (Liquitex)
Optional:
  • Liquid Sculpey
  • pigment powder (Ranger Perfect Pearls)
  • embellishments, glitter markers
What you need, clockwise from left: Sculpey, Liquid Sculpey, image printed on t-shirt transfer paper, rolling pin, magnets, brush, clay tool, pigment powder
Polymer clay is amazingly versatile. You can roll it, stamp it, cut it out into any shape you want, then bake it in the oven to harden it. Once it's baked, you can paint it and embellish it.

For this project, we're going to combine the versatility of polymer clay with an inkjet image transfer technique. For Week 2, we made an image transfer gel skin using a laser printed image. Trouble is, most of us don't own laser printers. There aren't many options for image transfer with an inkjet printer - but one surprisingly successful trick is to use t-shirt transfer paper. Baked on top of the clay in the oven, the inkjet image transfers beautifully.

Let's get started.

Step 1: Prep the clay
Condition your clay by rolling it around in your hands until it's soft and pliable. I used plain white Sculpey that was old and hardened, so I squeezed on some Liquid Sculpey to help soften it up.

Then put your clay on a nonstick surface (freezer paper works well) and roll it with a rolling pin until it's a uniform 1/4 inch thickness. If you have a pasta machine, you can extrude it that way too.
Rolling the clay

Step 2: Add your images
You can use any digital images you have stored on your computer. I used a digital collage sheet with mermaid images from ARTchix Studio here - the images were already created and perfectly magnet-sized.

Cut out the images to the size you want. Optionally, you can rub some Liquid Sculpey onto the clay surface, which helps the images adhere to the clay. Position your images face down on the clay. Remember that your images will be reversed when transferred to the clay, so for words or numbers, reverse the image before printing it out.

Cut the clay to the image size with an Xacto knife or a pointed clay tool.
Cutting out the clay

Then rub over the image with the bone folder or spoon to make sure it's completely adhered to the clay.
Burnishing the image

You can optionally add some color and shine at this point by brushing pigment powder on the back and sides of your clay piece.
Adding pigment powder (optional)
Step 3: Bake
Polymer clay releases fumes when it bakes, which you don't want mucking up your oven. A nice trick I learned from A Work of Heart studio is to bake your clay in a pie pan with another pie pan clamped to the top, keeping the fumes inside the pans rather than your oven.

Place your clay pieces on a piece of parchment paper in the pie pan, then follow the clay baking instructions on the Sculpey package.

Step 4: Reveal and embellish
When the clay is cool to the touch, now comes the fun part: peeling off the transfer paper to reveal your image, now baked into the clay.

You can add little embellishments, paint, or some shine from a glitter pen at this point. The image doesn't always transfer perfectly, so you can hide imperfections by rubbing a similar-colored pigment ink stamp pad (such as Palette ink) over the bare areas.

Once your embellishments or inks have dried, brush a coat of acrylic varnish over the front, back, and sides of your piece (let the back dry before varnishing the front).

Peel the sticky backing off the magnet, adhere to the back of your clay piece, and replace those tacky old magnets with your new colorful creations.